

I was so excited to share the news of my Shepherds Hut with you in the last post, I've been waiting for the flowers to grow and the sun to shine to get the hut looking just right! I now want to show how much thought and craftsmanship went into creating the hut itself over the winter, but also how much effort went into getting it into the garden - not an easy task!
My hut was built by Beechleaf Carpentry, where Paul creates all his huts to each clients specifications, which is just as well, considering our proposal was unique to say the least! I think we have the most suburban of all his huts...for now!
We originally saw his work at the Birtley House Wood Fair in 2011, so always had him in the back of our minds. A year later after we had such a monumental change in our lives and I found myself in charge of the garden, we just felt it was the right project for us. We just needed to figure out how we were going to get a Shepherds Hut down into my garden! My childhood playhouse stood in that section of the garden previously, but I was very pleased to find it a happy home just over the fence with our neighbours children, so I can still see it and more importantly - hear it being happily used!


My hut is utterly unique, not just in style, but because Paul ingeniously built it in sections so it could be transported from Sussex in hut form, then dismantled into sections, moved down a set of steps and into the garden, and re-built in it's final spot. Paul assessed our garden in October, and needless to say it was exciting, but I don't think I could quite believe how he was going to start on this!
Bearing in mind the hut is also insulated, double glazed, wired for electricity and placed on a solid steel chassis, it really wasn't going to be as simple as building a garden shed! But here's the proof, and successfully dismantle it they did! It was quite a day, they actually had to leave the hut in the driveway the previous day due to the bad weather, luckily it fitted past my house by a whisker - tense moment for all! I want to add I did actually put down the camera to help shift some of the hut! I remember one particular moment I was stuck underneath the corrugated steel roof, convinced I was about to be crushed into the mud, but as long as that roof had gone on alright I would have taken the blame! ;)


Paul's creations are built to traditional designs - many modern versions have strayed from that original shape, and I was determined to achieve an authentic structure (but with modern conveniences!). Can I just say - I am overjoyed to finally have a proper stable door, it's the simple things! I chose to have Dulux 'Rain Storm' for the main body of the hut, with 'December Dawn' on the doors and windows, quite a instant decision for me, but apparently most people choose the darker tone on the door? What do you think? I knew I wanted to stay away from the whole sage/grey/beige 'Heritage' look, and I honestly love my colours, wouldn't have it any other way!
The Chassis was built by Paul's local blacksmith, and I was lucky enough to have traditional looped window latches included - a small, but very effective touch. I am so proud that my hut champions such beautiful British craftsmanship. I was determined to continue that into future additions for the hut, so commissioned our lovely local carpenter to build me a custom desk and shelves - after I'd lived in the hut for a while and decided exactly what I wanted. I completely understand that due to budget, timescales and space, the 'flat pack' versions of these huts offer an alternative, but if you can, choose the artisan route, you won't regret it!


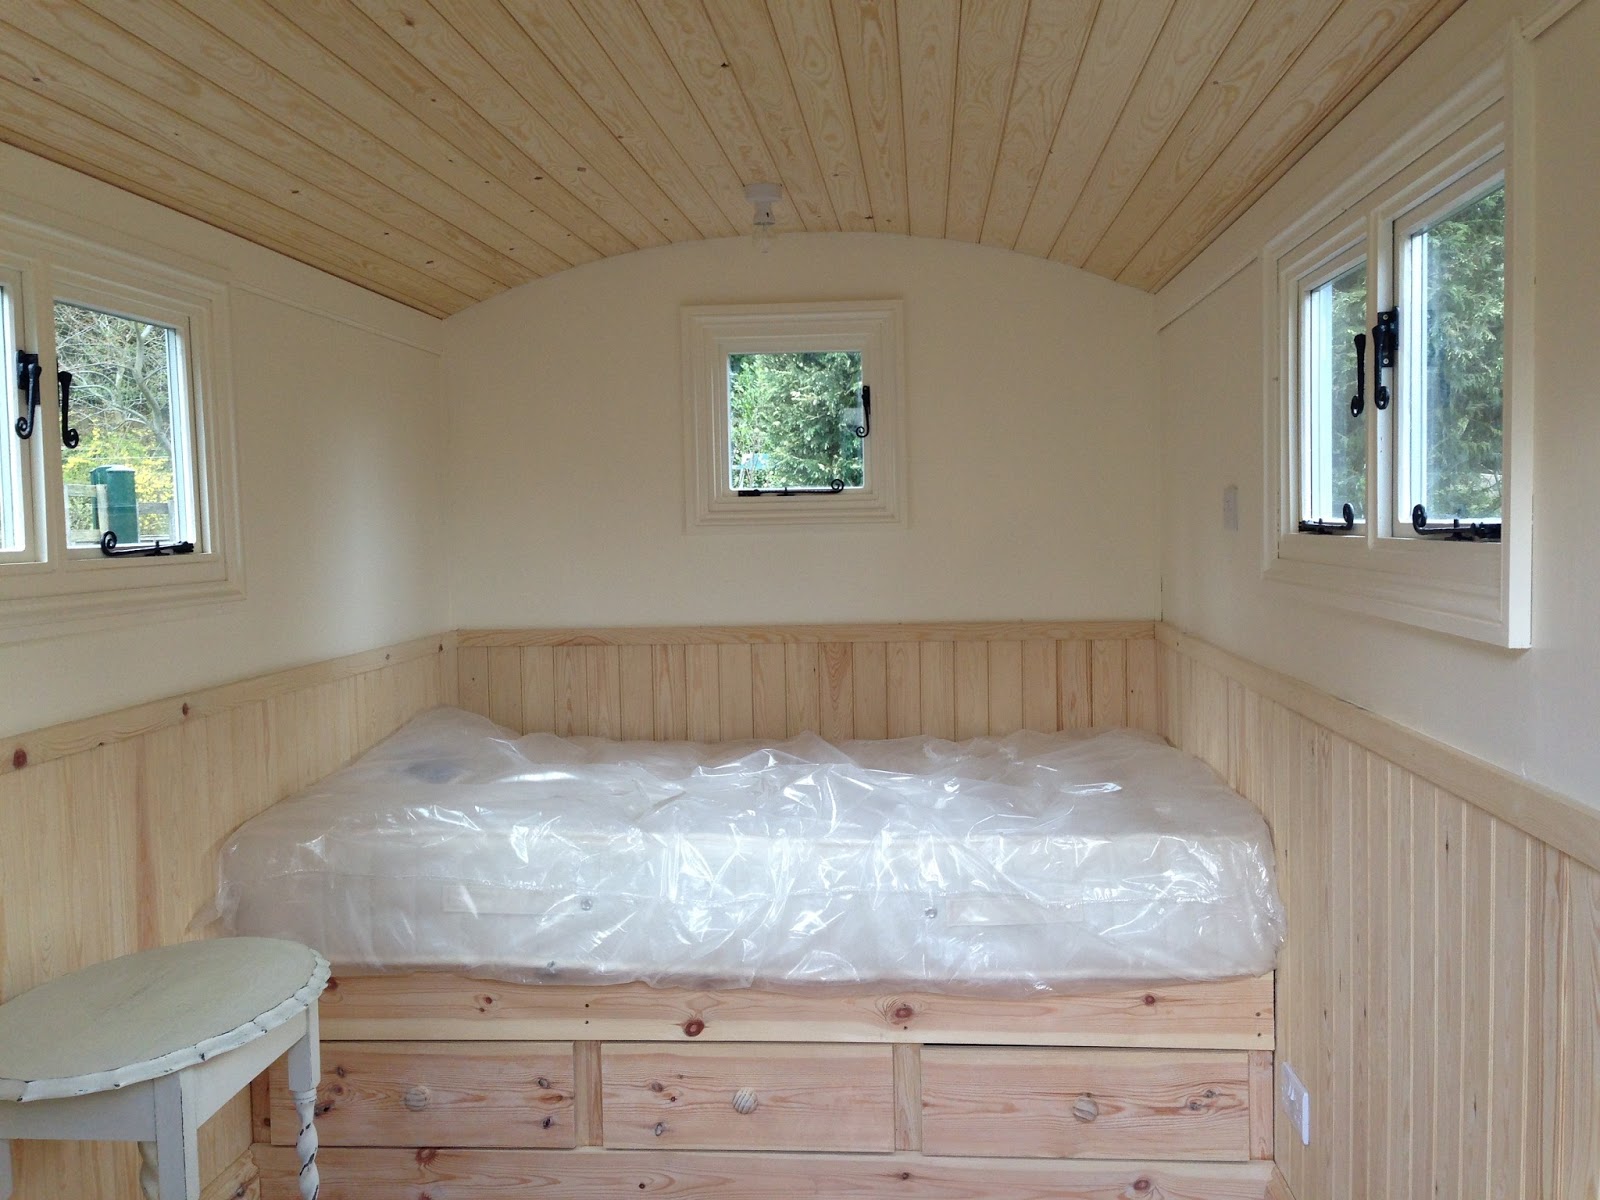
And before I knew it, it was up to me to decorate and furnish my new hut. At first I couldn't believe I could just walk up to it and have a cup of tea sat on the steps in the sunshine, it took a few days to realise it was truly mine! I decided to keep the interior simple, knowing it would be filled with my collection of curiosities soon enough. I chose to have the hut only half wood-clad (to avoid that possible 'Swedish Sauna' look!) and painted the walls in Crowns 'Old English White' Eggshell paint. I then spent two VERY hot sunny days in the hut waxing all the wood with beeswax, which still smells divine in there now! I was proud to decorate it myself, it was quite an achievement, and the final personal touch to celebrate the craftsmanship of the hut. You can see those beautiful blacksmith window latches in this photo! The daybed is a small double, so plenty of room for cushions, blankets, dogs, books, friends and trays of tea! That lovely pie crust table was an upcycled find from Tweseldown Artisan Market, it fits just right!

Before and after! You can probably now see why I kept the decorating minimal - quite a lot of different things in there! I am so proud of the hut, and I hope to spend many happy (and productive) hours in there over the winter, fire on, slippers on, blanket, dog and a thermos of tea - just lovely!
Thanks for reading!
Katie


3 comments :
I am SO impressed with this! With the construction and craftsmanship of course, but also with the homely touch you've given it, I could curl up there with a cuppa right now.
I hope you get much enjoyment out of it! I'm gleening some decorating tips too - I suddenly have a whole house to decorate, and it's a bit daunting!
P x
ohhhhhh great, I really love it, I wonder how much could you pay for a Shepherd hut. pretty!
http://deslisse.blogspot.com/
Post a Comment